Sealing grout is a crucial step in maintaining the beauty and functionality of your tiled surfaces. Whether you’re dealing with a new installation or refreshing older grout lines, sealing helps protect against moisture, stains, and discoloration. In this guide, we’ll walk you through the entire process of sealing grout, share valuable tips and tricks, and explain how proper sealing contributes to keeping tile clean for years to come.
Why Sealing Grout Is Important
Grout is a porous material that easily absorbs dirt, water, and stains if left unprotected. Over time, unsealed grout can lead to discoloration, mold growth, and even damage to the tiles themselves. Sealing grout provides a barrier that:
- Prevents water absorption and moisture buildup.
- Protects against stains from spills or dirt.
- Makes tiles cleaning easier and more effective.
- Extends the life of your tiled surfaces.
By sealing grout, you not only maintain a fresh and clean appearance but also reduce the risk of costly repairs.
When to Seal Grout
Knowing the right time to seal grout is essential for achieving the best results. Here are some scenarios to consider:
New Tile Installations
For new tile installations, grout must cure completely before sealing. This curing process typically takes 48 to 72 hours, but always refer to the grout manufacturer’s guidelines.
Existing Grout
If your grout hasn’t been sealed before or if the sealant has worn off, it’s time to reapply. Test the existing sealant by sprinkling water on the grout lines. If the water beads up, the sealant is still effective. If the water soaks in, it’s time to reseal.
Post-Cleaning
Always seal grout after deep cleaning to lock in the refreshed appearance and protect it from future stains.
Tools and Materials Needed
Before you start sealing grout, gather the necessary tools and materials. Having everything on hand ensures a smooth and efficient process.
- Grout sealer (penetrating or membrane-forming)
- Applicator tools (brush, roller, or spray bottle)
- Clean cloth or sponge
- Masking tape (optional)
- Protective gloves
- Tile cleaner and grout brush
- Bucket of clean water
Types of Grout Sealers
Choosing the right grout sealer is critical for long-lasting results. The two main types of sealers are:
Penetrating Sealers
Penetrating sealers are absorbed into the grout, forming a protective barrier beneath the surface. They are ideal for high-moisture areas like bathrooms and kitchens because they allow the grout to breathe while repelling water and stains.
Membrane-Forming Sealers
These sealers create a surface layer on the grout, preventing moisture and stains from penetrating. They’re best for low-moisture areas but can wear down faster in high-traffic zones.
Step-by-Step Guide to Sealing Grout
Step 1: Clean the Tiles and Grout
Start by thoroughly cleaning the tiled surface to remove dirt, grease, and any previous sealant. Use a specialized tile cleaner and grout brush for best results. Rinse with clean water and allow the area to dry completely before proceeding.
Step 2: Protect Surrounding Areas
If your tiles are porous or you’re concerned about sealer spilling onto the tiles, use masking tape to cover the edges. This step ensures the sealer stays on the grout lines where it’s needed.
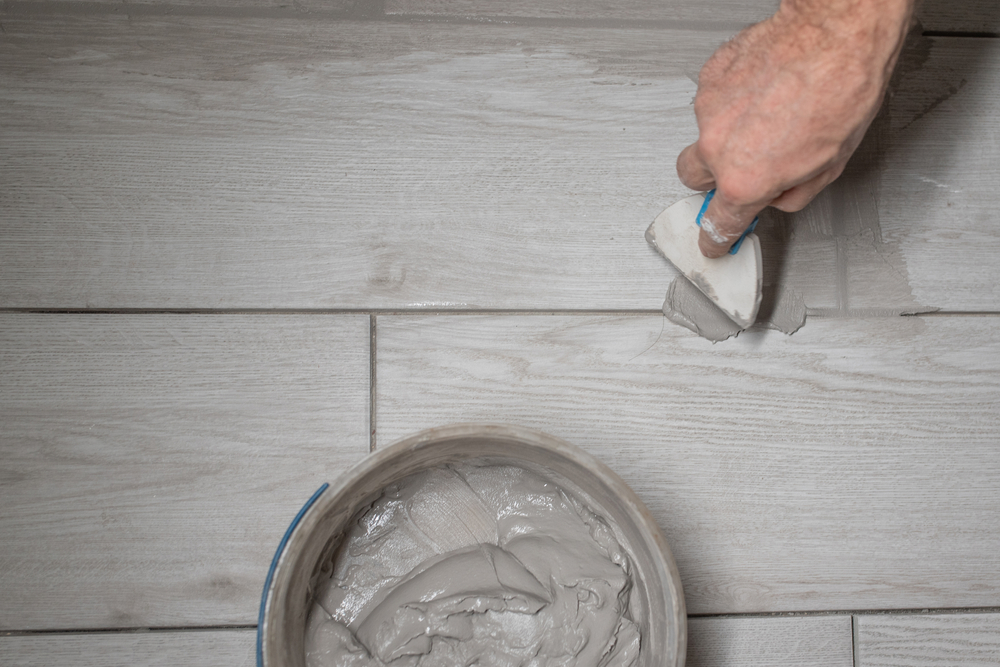
Step 3: Apply the Grout Sealer
Choose the applicator that works best for your sealer type. Common options include a small brush, roller, or spray bottle.
- Brush or Roller: Dip the brush or roller into the sealer and carefully apply it along the grout lines.
- Spray Bottle: Hold the spray bottle close to the grout and spray evenly. Be sure to wipe off excess sealer from the tiles immediately to avoid streaks.
Step 4: Let It Soak
Allow the sealer to soak into the grout for the time specified on the product label, usually 5-10 minutes. This step ensures maximum penetration and protection.
Step 5: Wipe Off Excess Sealer
Use a clean, dry cloth to wipe off any excess sealer from the tiles. This prevents residue buildup and leaves a clean finish.
Step 6: Apply a Second Coat (If Needed)
For optimal protection, consider applying a second coat of sealer. Follow the same process as the first coat and allow sufficient drying time between applications.
Step 7: Allow to Cure
Let the sealer cure completely before using the tiled area. Curing times vary by product but typically range from 24 to 48 hours.
Tips for a Professional Finish
- Work in Small Sections: Sealing grout in small sections helps you maintain control and ensures even application.
- Use High-Quality Products: Invest in a reputable grout sealer for superior protection and durability.
- Follow Manufacturer’s Instructions: Always adhere to the guidelines provided with your chosen sealer.
How to Maintain Sealed Grout
Sealing grout is just the first step in protecting your tiles. Regular maintenance keeps them looking fresh and ensures the sealant remains effective.
Regular Cleaning
Use a gentle tile cleaner and soft brush to clean your tiles and grout lines. Avoid harsh chemicals that can degrade the sealant over time.
Spot Cleaning
Address spills and stains promptly to prevent them from seeping into the grout. Sealed grout makes this easier, as the protective barrier repels most substances.
Reapply Sealer Periodically
Depending on the type of sealer and the area’s usage, you may need to reseal grout every 1-2 years. High-traffic areas may require more frequent resealing.
Common Mistakes to Avoid
Avoid these pitfalls to ensure a successful grout sealing process:
- Skipping the Cleaning Step: Sealing over dirty grout traps grime and leads to an uneven finish.
- Using the Wrong Sealer: Choose a sealer suited to your grout type and location.
- Applying Too Much Sealer: Excessive sealer can leave a sticky residue and uneven appearance.
Frequently Asked Questions
Can I Seal Grout Myself?
Yes, sealing grout is a DIY-friendly task. With the right tools and proper technique, you can achieve professional-looking results.
How Do I Know If My Grout Needs Sealing?
Perform the water test by sprinkling water on the grout lines. If the water soaks in, it’s time to seal.
What’s the Best Way to Keep Tile Clean After Sealing?
Use a mild cleaner and avoid abrasive tools. Regular maintenance helps preserve the sealant and keeps your tiles looking pristine.
Conclusion
Sealing grout is an essential step in maintaining the longevity and beauty of your tiled surfaces. By following this comprehensive guide, you can protect your grout from stains, moisture, and wear, ensuring a polished and clean appearance for years to come. With proper sealing and regular maintenance, keeping tile clean becomes effortless, allowing you to enjoy the aesthetic and functional benefits of your tiles without worry.
Need Cleaning Experts Near You?
Here at Rug Busters Carpet Upholstery and Tile Cleaners Inc., we’ve been your trusted cleaning experts in The Keys since 1987, delivering top-tier service for everything from yachts and homes to airplanes and vehicles. Whether you need carpets refreshed, tile and grout restored, or hardwood floors like bamboo and terrazzo gleaming like new, we’ve got you covered. Facing water or fire damage? We specialize in complete restorations, getting your space back to its best. We also offer powerful pressure washing for patios, driveways, soffits, and more! Let us handle the dirty work so you can enjoy a spotless, worry-free space. Contact us today for a professional clean you’ll love!
Living near the coast comes with many perks: stunning ocean views, fresh sea air, and beautiful beachfront access. However, coastal living also presents unique challenges, particularly the effects of sea salt exposure on home surfaces, including tiles. Sea salt erosion can cause tiles to become discolored, lose their shine, and degrade over time. Understanding how to protect your tiles from sea salt erosion can help extend their lifespan and keep your property looking pristine.
Understanding Sea Salt Erosion
What is Sea Salt Erosion?
Sea salt erosion occurs when salty air, water, or mist comes into contact with surfaces over time. Salt particles, carried by wind and water, settle on surfaces and seep into tiny pores or cracks. This process can degrade both the surface and the structural integrity of tiles. The erosion process is often slow but persistent, eventually causing noticeable damage such as fading, cracking, or disintegration.
Why Are Coastal Tiles More Vulnerable?
Tiles near coastal areas are constantly exposed to high levels of humidity, salty air, and water. These environmental conditions accelerate the natural wear and tear of tile materials. Additionally, salt crystals that form on tiles can absorb moisture, leading to further expansion and contraction within the tile structure. This continuous cycle weakens the tiles over time, especially if the tiles are unprotected or made from porous materials.
Types of Tiles Commonly Affected by Sea Salt
Porcelain Tiles
Porcelain tiles are relatively durable and non-porous, making them more resistant to water absorption. However, prolonged exposure to salty air can still cause surface dullness if they are not adequately maintained.
Ceramic Tiles
Ceramic tiles are more porous than porcelain and can absorb more moisture. This makes them highly susceptible to cracking and salt residue buildup if left untreated.
Natural Stone Tiles
Natural stones such as limestone, travertine, and marble are beautiful but extremely porous. They can be particularly vulnerable to salt erosion, as saltwater can easily penetrate their porous surfaces and cause staining or surface degradation.
How to Protect Your Tiles from Sea Salt Erosion
1. Choose the Right Tile Materials
When installing tiles in a coastal home, consider using non-porous, durable materials such as high-quality porcelain or treated ceramic. These materials have lower absorption rates and are less likely to be affected by salty air and water. Additionally, consider sealing natural stone tiles with a protective coating to make them more resistant to moisture and salt.
2. Apply a High-Quality Sealant
Sealing your tiles is one of the most effective ways to protect them from sea salt erosion. A good tile sealant forms a protective barrier over the surface, preventing salt particles from penetrating the tile’s pores.
Types of Sealants
- Penetrating Sealants: These sealants absorb into the pores of the tile and create an internal barrier against moisture and salt.
- Surface Sealants: These provide a protective layer on top of the tile surface, acting as a shield against external elements.
For coastal areas, a combination of penetrating and surface sealants may provide the best protection. Reapply sealants according to manufacturer recommendations, typically every 1-2 years, depending on exposure levels.
3. Regular Cleaning and Maintenance
Consistent cleaning helps prevent salt residue from building up on your tiles. Use mild, non-abrasive cleaners designed for the specific type of tile you have.
Cleaning Tips:
- Rinse outdoor tiles with fresh water regularly to wash away salt particles.
- Avoid harsh chemical cleaners that can strip protective sealants.
- Use a soft brush or mop to remove residue without scratching the surface.
For stubborn salt stains, use a pH-neutral cleaner that is safe for stone and ceramic surfaces.
4. Install a Drainage System
Proper drainage can significantly reduce the amount of saltwater that pools on tiled surfaces. For outdoor patios, balconies, and walkways, ensure there is adequate slope and drainage to direct water away from tiled areas. This prevents prolonged exposure to saltwater and reduces the risk of erosion.
5. Minimize Saltwater Contact
Although it may be impossible to avoid saltwater entirely, minimizing direct exposure can help. Here are some ways to do this:
- Use outdoor rugs or mats to cover tiled surfaces in high-exposure areas.
- Install protective overhangs or awnings to reduce rain and mist contact.
- Rinse surfaces with fresh water after storms or high tide events.
6. Repair and Restore Damaged Tiles Promptly
Cracks or chips in tiles can allow more moisture and salt to seep in, accelerating erosion. Regularly inspect your tiles for signs of damage and address any issues promptly. Replacing or repairing damaged tiles can prevent the problem from spreading and protect the surrounding tiles.
Preventive Measures for Indoor and Outdoor Tiles
Protecting Indoor Tiles
Even indoor tiles can be exposed to salty air in coastal homes due to open windows and doors. Use air purifiers and dehumidifiers to reduce moisture levels inside your home. Additionally, consider using window treatments that can limit direct exposure to salt-laden air.
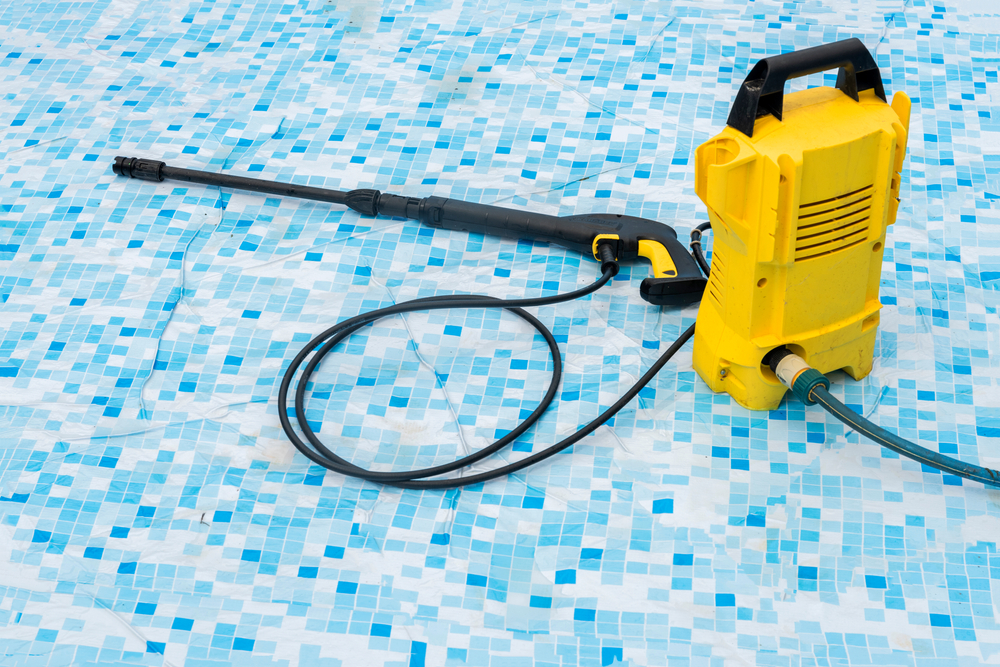
Protecting Outdoor Tiles
Outdoor tiles face the harshest conditions and require extra care. In addition to sealants and regular cleaning, consider:
- Installing windbreaks, such as hedges or fences, to reduce direct exposure to salty wind.
- Applying UV-protective coatings to shield tiles from sun damage, which can weaken their surface and make them more susceptible to erosion.
Common Mistakes to Avoid
Using the Wrong Cleaning Products
Many homeowners use harsh cleaners that contain acids or bleach, which can damage sealants and worsen tile erosion.
Ignoring Early Signs of Damage
Small cracks, chips, or stains may seem minor, but they can quickly worsen if not addressed. Ignoring early signs of damage can lead to costly repairs or replacements.
Neglecting Routine Maintenance
Failing to clean and reseal tiles regularly can allow salt to accumulate and penetrate tile surfaces. Routine maintenance is essential for long-term protection.
Long-Term Benefits of Tile Protection
Protecting your tiles from sea salt erosion has long-term benefits, including:
- Increased Lifespan: Properly maintained tiles can last for decades, even in harsh coastal conditions.
- Cost Savings: Regular maintenance and preventive measures can save you from costly repairs and replacements.
- Aesthetic Appeal: Protected tiles retain their original beauty, color, and shine, enhancing the overall appearance of your home.
Conclusion
Living near the coast doesn’t mean you have to sacrifice the beauty and durability of your tiles. By choosing the right materials, applying protective sealants, and maintaining a consistent cleaning routine, you can protect your tiles from sea salt erosion and enjoy a stunning, well-maintained home for years to come. Investing in preventive care and timely repairs ensures that your tiled surfaces remain as pristine as the ocean views you cherish.
Need Cleaning Experts Near You?
Here at Rug Busters Carpet Upholstery and Tile Cleaners Inc., we’ve been your trusted cleaning experts in The Keys since 1987, delivering top-tier service for everything from yachts and homes to airplanes and vehicles. Whether you need carpets refreshed, tile and grout restored, or hardwood floors like bamboo and terrazzo gleaming like new, we’ve got you covered. Facing water or fire damage? We specialize in complete restorations, getting your space back to its best. We also offer powerful pressure washing for patios, driveways, soffits, and more! Let us handle the dirty work so you can enjoy a spotless, worry-free space. Contact us today for a professional clean you’ll love!